A smooth transition between different flooring materials does more than complete a space. It enhances safety, protects floor edges, and creates a polished, cohesive look. The small but vital component that makes this possible is the floor transition strip. Whether you’re a homeowner updating your floors or a contractor ensuring a perfect finish, understanding how and why to use transition strips can elevate both the function and design of any room.
What Is a Floor Transition Strip?
A floor transition strip is a narrow piece of material designed to bridge the gap where two types of flooring meet. It creates a seamless connection between materials such as tile and wood, laminate and vinyl, or carpet and hard surfaces. Beyond improving aesthetics, it helps manage height differences and prevents tripping hazards.
According to BuildDirect, transition strips are key to maintaining the professional appearance of a flooring installation while allowing for the natural expansion and contraction of materials due to humidity or temperature changes. Without them, floors may shift, buckle, or leave visible gaps over time. This simple detail can make the difference between a finished floor that looks built-in versus one that feels incomplete.
Why Use a Floor Transition Strip?
Floor transition strips are more than decorative trims. They perform important safety and maintenance functions that extend the life of your flooring.
Enhancing Safety and Avoiding Trip Hazards
When two flooring types meet at different heights, even a small difference can cause a stumble or trip. Transition strips smooth out the elevation change, creating a safe walking surface. In high-traffic areas such as hallways, entrances, or commercial buildings, this simple measure reduces accidents and ensures compliance with flooring safety standards (MSI Surfaces, 2025).
Improving Aesthetic Flow Between Surfaces
A transition strip unites different textures or colors to achieve a visually consistent flow. In open-concept homes where living rooms transition into kitchens or hallways, they help define zones without breaking the design harmony. Interior designers often choose finishes that either blend subtly with the floor or act as an accent trim to complement furniture and décor.
Protecting Flooring Edges and Allowing Movement
Every floating floor system, such as laminate or SPC vinyl, needs expansion gaps along the edges. Transition strips cover those gaps, preventing dust and moisture from entering while letting the flooring expand and contract naturally. Over time, this protection minimizes edge damage and preserves the integrity of your floor (Ghonor Flooring, 2024).
Types of Floor Transition Strips and When to Use Them
Transition strips come in several profiles, each suited to specific flooring combinations and installation conditions.
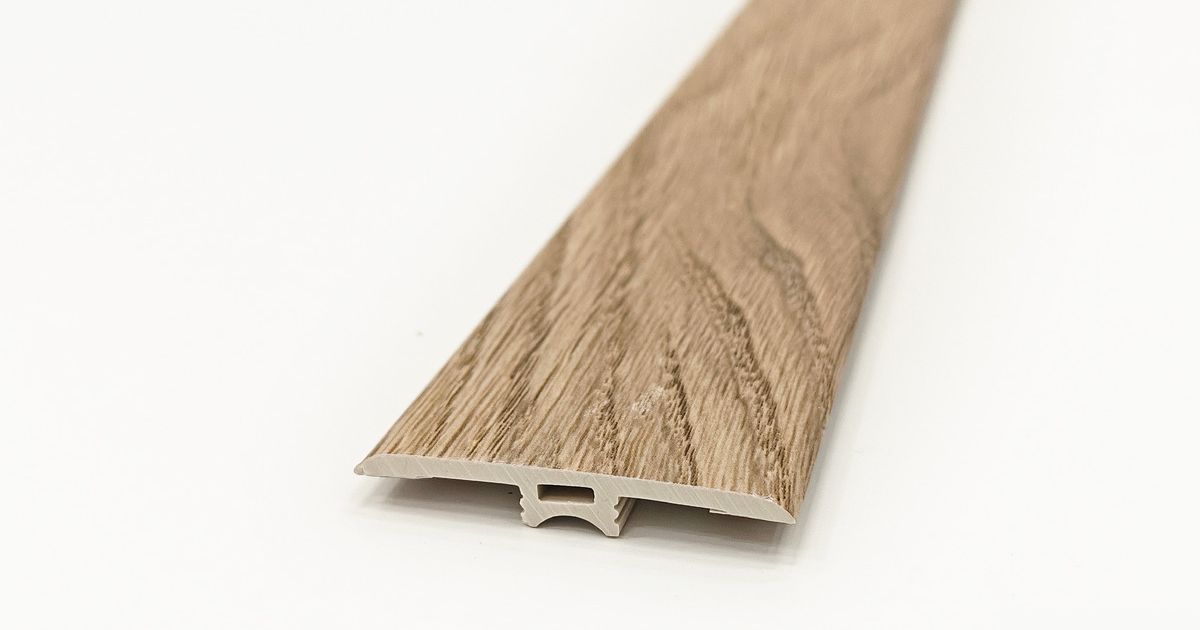
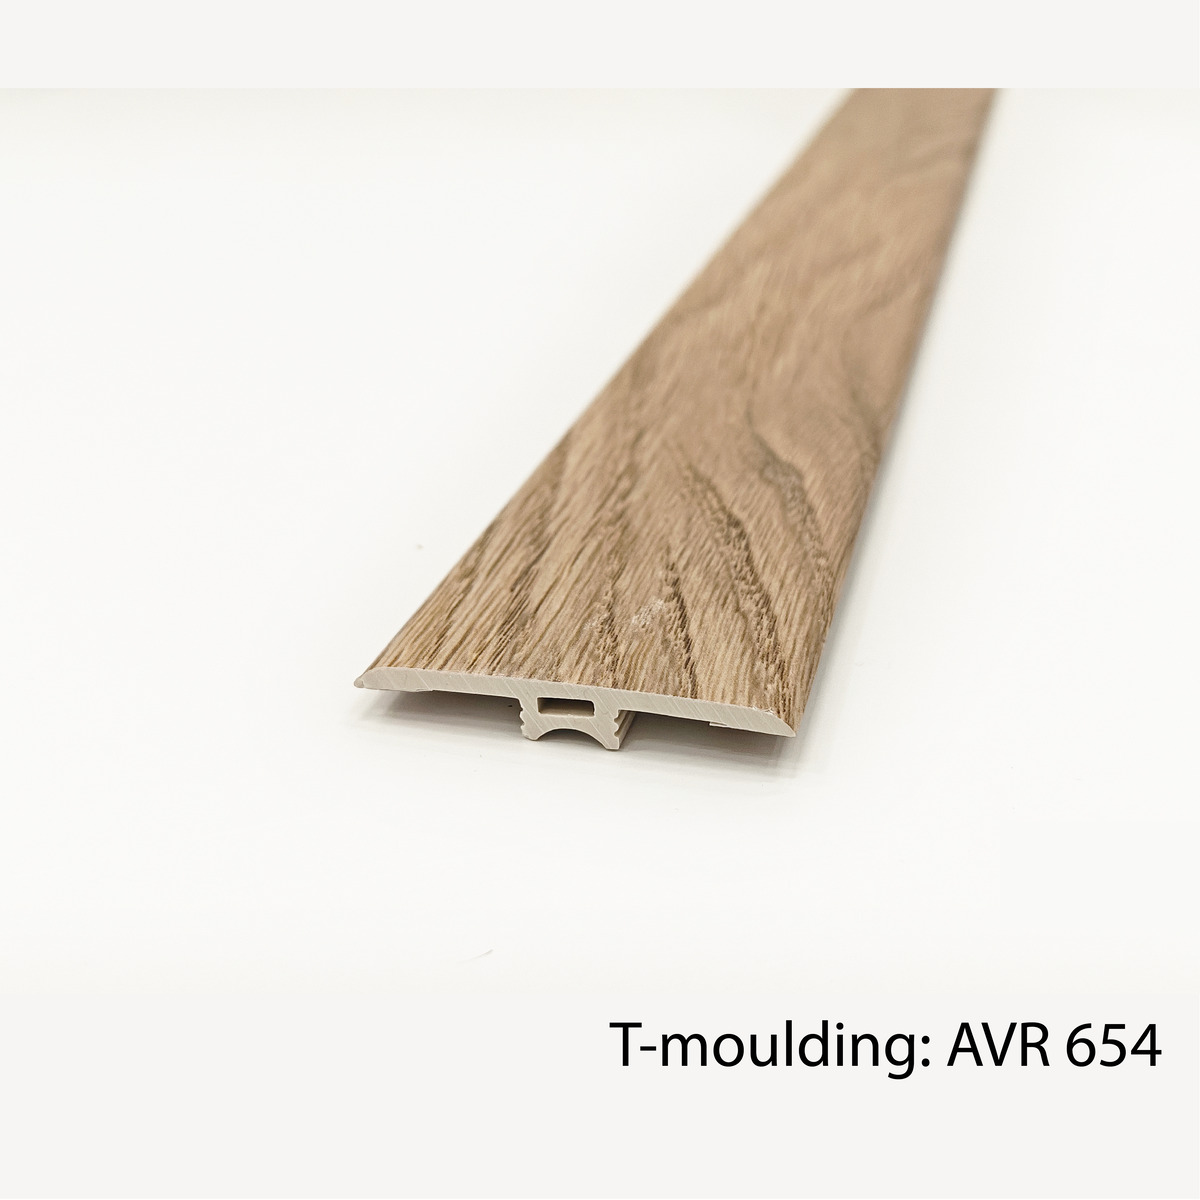
T-Moulding (for Equal Height Floors)
T-moulding is shaped like the letter “T” and is used when two flooring types of equal height meet, such as laminate to laminate or wood to vinyl plank. The vertical section of the “T” fits into a small gap, while the top covers the joint, creating a smooth transition. It’s ideal for large open areas or room-to-room connections with consistent floor levels.
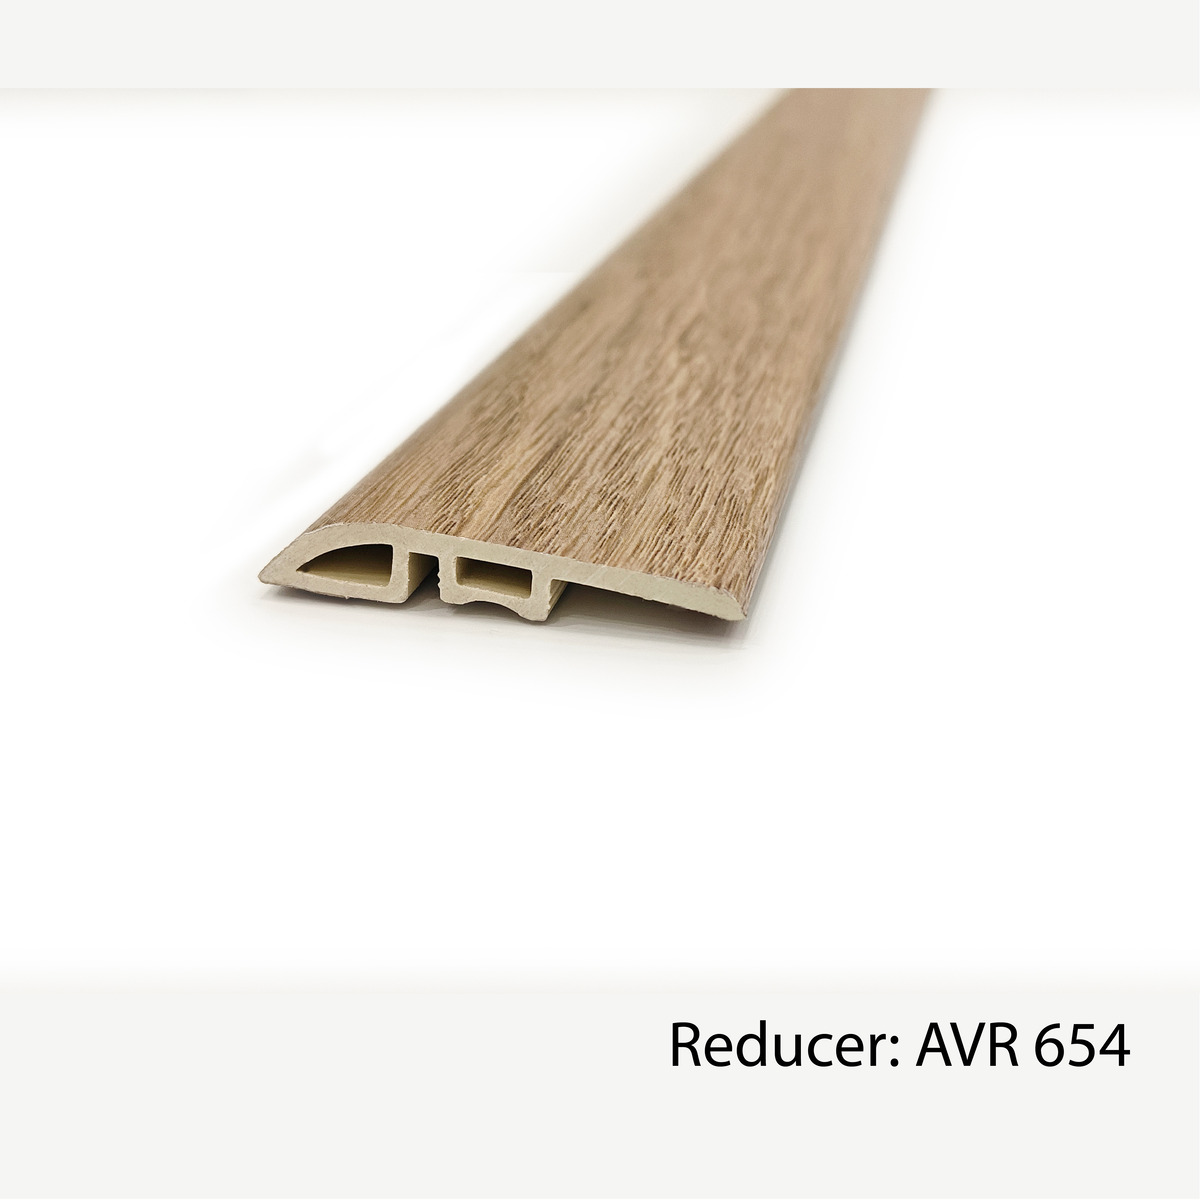
Reducer Strip (for Height Differences)
A reducer strip connects floors of different heights, for example, from tile to vinyl or hardwood to carpet. It slopes gradually from one level to another, minimizing abrupt drops that could cause tripping. Many manufacturers recommend aluminum or PVC reducers for durability in high-traffic spaces.
End Cap or Threshold Strip
End caps, also known as square nose or threshold mouldings, are used where flooring meets a wall, sliding door track, or other vertical edge. They provide a clean termination while protecting the exposed edge from chipping or fraying. These profiles are common at patio doors or between indoor and outdoor transitions.
Carpet Transition and Stair Nosing
Special transition strips are available for connecting carpet to hard surfaces or finishing stair treads. Carpet transitions feature a grip channel that holds the carpet edge securely, preventing unraveling. Stair nosing, on the other hand, reinforces the edge of steps and improves traction, an important safety feature in residential and commercial settings.
Each type serves a distinct role. Choosing the right one depends on the materials, height difference, and desired visual effect (BuildDirect, 2024).

Choosing the Right Material and Finish
Transition strips are made from a range of materials, each offering different benefits for function and style.
-
Wood: Ideal for matching hardwood floors. Wood trims create a warm, cohesive look and can be stained to match the flooring tone. However, they are less moisture-resistant and better suited for dry interior areas.
-
Metal: Aluminum or stainless-steel strips are durable and resist dents or corrosion. They are commonly used in commercial or high-traffic areas. Brushed or polished finishes can complement modern interiors (Carpet Runners UK, 2024).
-
Vinyl or PVC: Flexible, affordable, and moisture-resistant, making them perfect for bathrooms, kitchens, and basements. Available in multiple colors to blend with vinyl planks or tiles.
-
Rubber or Composite: Provide slip resistance and flexibility for industrial or gym environments.
-
Hybrid Profiles: Some designs combine aluminum bases with decorative inserts for both durability and style.
When choosing a material, consider:
-
The height difference between floors
-
Traffic level and expected wear
-
Moisture or temperature exposure
-
Desired color and aesthetic compatibility
Selecting a finish that harmonizes with your flooring or décor can transform the transition strip from a functional necessity into a design feature (Wood and Beyond, 2024).
Installation and Practical Tips
Proper installation ensures that your floor transition strip performs well over time. Whether you are a professional installer or a handy homeowner, attention to detail is key.
-
Measure accurately. Determine the width of the gap and the height difference between the two flooring types.
-
Choose the correct profile. Use T-moulding for equal height, reducer for different levels, and end cap for edges.
-
Prepare the surface. Clean the area to remove dust or debris that could affect adhesion or fitting.
-
Allow for expansion. Leave the manufacturer-recommended expansion gap before installing the strip, especially with floating floors.
-
Secure properly. Use the right method for the material, adhesive for vinyl bases, screws or tracks for metal or wood trims.
-
Finish neatly. Ensure the strip is level and aligned for a continuous, polished look.
Transition strips require minimal maintenance. Regular cleaning and periodic inspection will keep them in good condition. Replace any damaged strips promptly to prevent edge lifting or tripping.
ProfileDecor (2025) notes that while some seamless installations can skip a transition strip, doing so risks damage to flooring joints or visible expansion gaps. For longevity and a professional appearance, it’s better to include them in most installations.
Common Mistakes and How to Avoid Them
Even experienced installers can make small errors that impact both function and appearance.
-
Using the wrong type of strip: Always match the profile to the flooring materials and height difference.
-
Ignoring expansion gaps: Failure to leave space can cause floors to buckle or crack.
-
Poor alignment or cutting: Misaligned strips create uneven edges and visible gaps.
-
Incompatible materials: Avoid using wooden strips in high-moisture areas or metal strips without protective coating in coastal environments.
-
Rushing installation: Allow adhesives or finishes to cure properly before use.
Preventing these issues ensures both a safe and visually appealing transition.
Cost, Value, and Specification Considerations
The cost of floor transition strips varies widely based on material, finish, and installation complexity. Vinyl or PVC strips may cost only a few dollars per linear foot, while premium aluminum or hardwood trims can be several times higher. However, the value they provide in safety, durability, and professional aesthetics, usually far outweighs their cost.
For commercial or large residential projects, specifiers should include:
-
Material and profile type
-
Height/width dimensions
-
Finish or color code
-
Load rating or durability class
-
Compatibility with flooring manufacturer warranty
Investing in high-quality strips ensures compliance with flooring warranties and safety standards while elevating design quality.
Summary and Best Practice Recommendations
A floor transition strip might seem like a minor detail, but it plays a vital role in every flooring project. It ensures smooth transitions, reduces safety risks, protects edges, and brings a refined finish to interiors.
To summarize:
-
Use the correct profile for your floor combination.
-
Match materials and finishes to both performance needs and design goals.
-
Install carefully with proper alignment and expansion gaps.
-
Maintain regularly for long-term value.
By treating transition strips as an integral design component rather than an afterthought, you achieve both beauty and performance that lasts.
FAQ
When do I need a floor transition strip between rooms?
You need a transition strip whenever two different flooring materials meet or when there is a height difference between surfaces. It creates a safe, clean connection and protects edges from damage.
Can I skip a transition strip if both floors are the same height?
In some cases, yes, especially if it’s the same flooring material. However, without a strip, expansion gaps may be visible, and the edges can wear faster over time.
What material is best for high-traffic areas?
Metal transition strips, particularly aluminum or stainless steel, are best for heavy use. They resist impact, wear, and corrosion while maintaining a sleek appearance.
Can I install a floor transition strip myself?
Yes. Most DIYers can install one using a measuring tape, adhesive, and saw. Just ensure the strip matches the flooring type and leave space for expansion before securing it.
References
-
BuildDirect. “Your Complete Guide to Flooring Transition Strips.” 2024.
-
Ghonor Flooring. “Advantages of Floor Transition Strips.” 2024.
-
MSI Surfaces. “A Guide to Luxury Vinyl Plank Transition Strips.” 2025.
-
Carpet Runners UK. “When to Use Metal Floor Transition Strips.” 2024.
-
Wood and Beyond. “Flooring Transitions: The Complete Guide with Visual Examples.” 2024.
-
ProfileDecor. “Are Floor Transition Strips Necessary?” 2025.